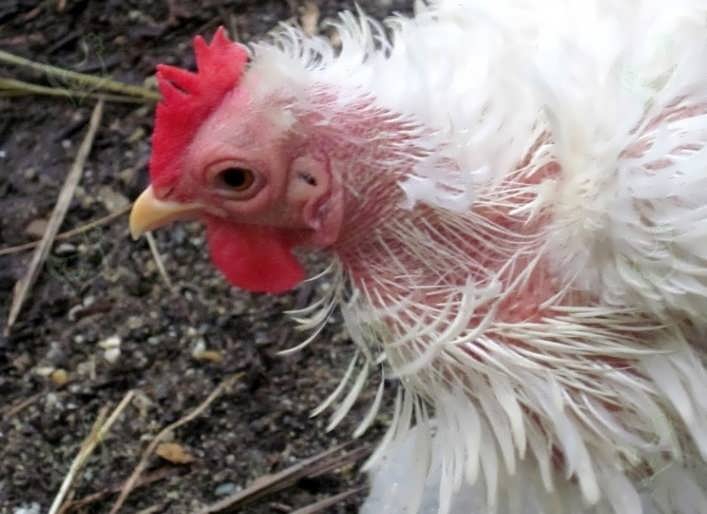
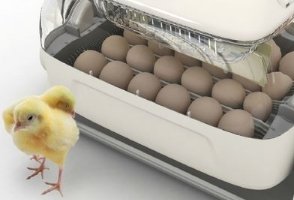
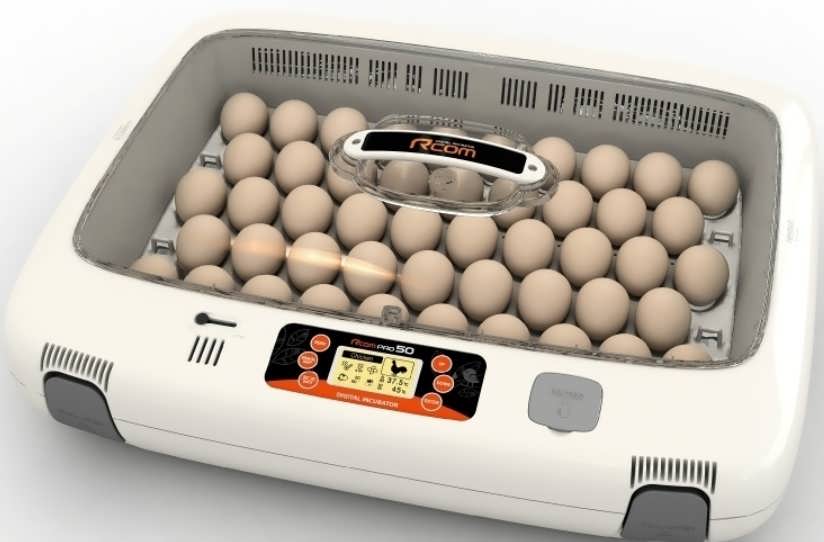
An incubator is a device for maintaining certain conditions (temperature, humidity) for the speedy growth of offspring. Usually this term is used in relation to devices for incubation of bird eggs.
There is nothing complicated in the device of this device, so you can assemble an incubator with your own hands at home.
Types of devices and device rules
When making an incubator for eggs with your own hands, heat-insulating walls are needed. Of course, the most difficult part is the automatic flip mechanism. But the main classification of home-made devices is based on the type of case material.
For these purposes, you can use the following things:
- The chamber of a non-working refrigerator.
- Cardboard box.
- Foam sheets.
- Plywood or wood.
In addition, incubators can be with or without egg turning However, home-made structures can have any technology and number of tiers. It all depends on the skill of the manufacturer.
Primary requirements
Before you make an incubator with your own hands, read the general requirements. For growing most types of chicks, a temperature of +37 ... + 39 oC is required. However, it should gradually fall during the entire period of incubation. Underheating is fraught with the death of chicks, overheating - anomalies of the anatomical structure and death in the first days of life. The temperature for the beginning and end of the incubation period for each bird species is indicated in the table.
| At first | At the end | |
| Chicken | 38,5 | 37,6 |
| duck | 37,8 | 37,1 |
| Goose | 38,4 | 37,4 |
| turkey | 37,6 | 37,1 |
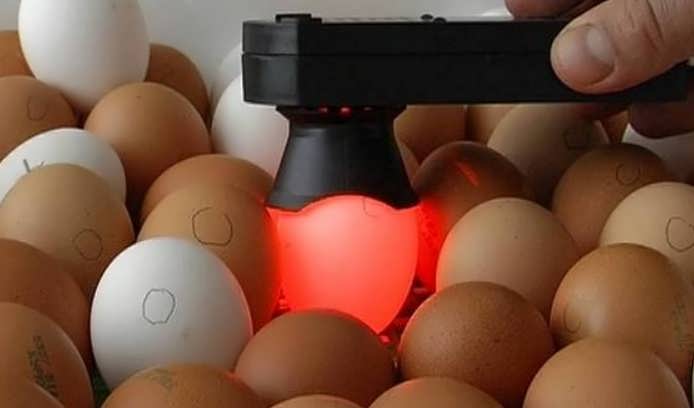
At the beginning of the incubation , the humidity should be in the order of 40-60%. When the chicks are trying to get out of the egg, the moisture content should be raised to 80%. Before transferring babies from the incubator, the humidity can be reduced to 55-60%. This is what requires a tray with water at the bottom of the chamber. To maintain a high temperature and optimal humidity , ventilation is done so that the air speed is 5-6 m / s.
Preparation for work
First of all, you need to calculate the required area. On a tray of medium size (450 * 350 mm) fits the following number of eggs:
More often, an incubator is made for chicken eggs. For them there is a separate table for the size of the tray:
| eggs | Tray dimensions |
| 45 | 45x25x28 |
| 70 | 55x55x28 |
| 100 | 60x60x28 |
Of course, these are approximate figures. The exact number depends on how tightly the eggs will lie and what size they will be. Therefore, when drawing an incubator diagram with your own hands, you need to take into account the approximate number of eggs, and not the exact one. However, in most cases, in the manufacture of an incubator, you have to use the materials that are at hand.
In addition, the camera has a few more requirements:
- The body must be dry and clean. The surface must not be covered with dyes, grease or mold.
- It is necessary to assemble the chamber in such a way that in the future heat does not flow out of it. To do this, use a sealant.
- Calculate in advance the free space for a bath of water so that the necessary humidity is maintained in the chamber.
- You will need to make several holes in the case so that there is air ventilation.
To create a homemade incubator with your own hands, you will need the following components:
- materials for the camera: refrigerator, sheets of cardboard, plywood, foam;
- egg trays;
- incandescent lamps with a power of 25-40 watts. A small device will need 2-3 pieces, and a refrigerator will need 4-6;
- thermometer;
- fan;
- hygrometer;
- to automatically turn eggs, you will need a temperature controller, a timer for a coup, a gearmotor, bearings with clamps;
- mounting tools: pliers, saw, knife, electrical tape, jigsaw;
- sealant.
Temperature maintenance
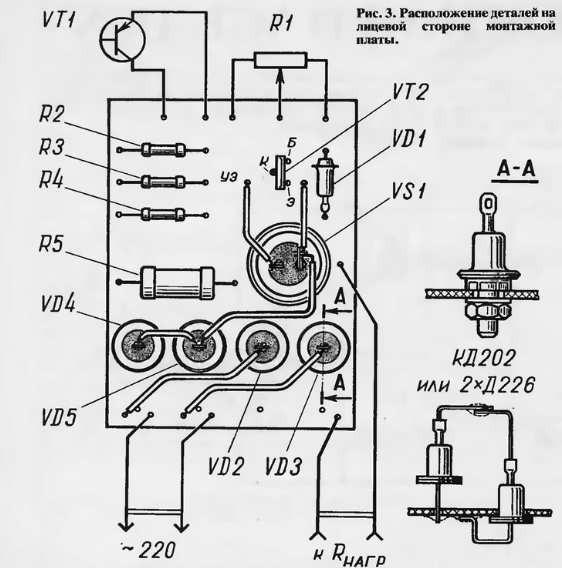
To automate maintaining a certain temperature in the chamber, you will need a special device - a ready-made thermostat. It consists of 3 parts:
- bimetallic plate. It turns on the device at a certain level of heating.
- Electrical contactor. Turns off the heater at high temperature.
- barometric sensor. Turns on the circuit at high pressure.
Egg turning mechanism
Eggs need to be shifted 2-4 times a day, so this business is best left to the automatic egg turning mechanism in the incubator. When the electric motor is turned on, it sets the rod in motion, and it, in turn, turns the egg tray.
To create a simplified device, you will need:
- The gearbox is placed at the bottom of the housing.
- You will need a wooden or metal frame that will hold the trays. They must be placed in such a way that they can tilt 60 degrees in one direction or the other.
- The gearbox must be securely fixed.
- The rod is connected to the motor on one side, and to the tray on the other.
Various types of incubators
Below are the technological features of various incubators.
From the fridge
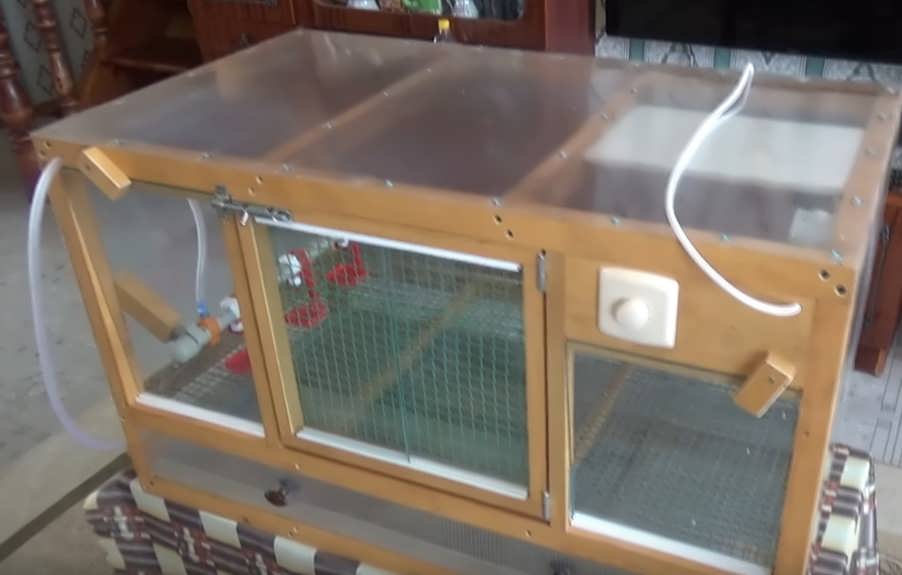
The chamber of a non-working refrigerator is ideal for creating an incubator. This device is made in such a way as to isolate the internal space and maintain a certain temperature inside; for this, an insulating gasket is mounted in the walls. In addition, it is quite spacious, so there is enough space for 1000 eggs.
Nets built into the refrigerator can be converted into incubator trays. The frames must be inserted into the grooves on the inner surface of the chamber, thanks to which the shelves can be easily arranged. In addition, there is enough space for the installation of heating systems (light bulbs), water tanks and a fan, which will maintain optimal performance.
Designing a home incubator from a refrigerator is impossible without installing ventilation. This system greatly affects the humidity and temperature of the air, and is involved in creating a suitable microclimate. Ventilation is extremely important, because at the end of the first week, the chicks will begin to consume oxygen from the atmosphere in their eggs.
For an incubator, the best air speed inside the chamber is 5 m / s, which you need to take care of before you assemble the incubator with your own hands. Such a speed can only be created by a sufficiently powerful fan. In addition, holes must be made at the top and bottom for the movement of air flows.
To create a heating system, 4 ordinary lamps with a power of 25 watts are placed inside the refrigerator. You can use 2 lamps of 40 watts. A sufficient level of heat is formed with a uniform arrangement of light sources throughout the interior of the refrigerator. It is advisable to put them at the bottom, as the flow of hot air will rise to the ceiling of the chamber, leaving through the top hole.
When arranging an incubator, you must perform the following actions:
- At the top and bottom, make several holes for the lamps to warm up the chamber. The number and diameter are calculated based on the number and radius of the plinths.
- At the bottom, you need to create 3 holes for ventilation with a diameter of one and a half centimeters.
- Holes for plinths and wiring must be sealed with cotton wool so that there is no draft.
- Get the shelves and put the trays.
- Inside you need to hold the sensor from the thermostat, the device itself is placed outside.
- In order for the air to pass through the chamber faster, it is recommended to place the fan not only at the bottom, but also at the top (near the holes). The fan can be taken from an old computer or bought at a specialized store.
- At the end, a viewing window needs to be hollowed out in the door, but it will definitely need to be covered with glass or film so that heat does not come out.
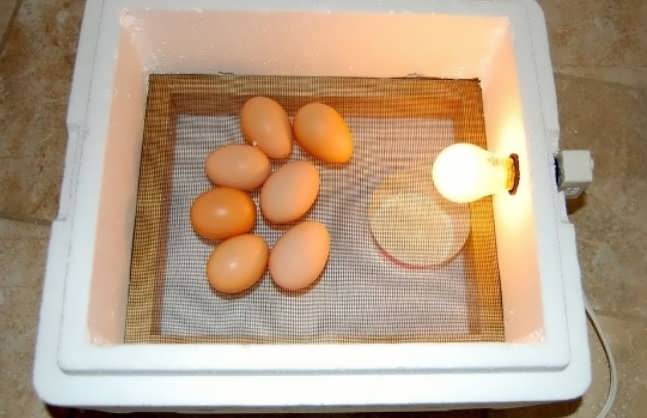
Styrofoam
More often, people use foam plastic for a homemade incubator, as it is cheap and has good heat-insulating properties. But there are two significant disadvantages - low strength and small size. You can forget about the space for 500 eggs, a few dozen will fit at most.
How to make an incubator:
- Cut out 4 identical parts for the walls of the incubator. To do this, you must first make drawings, and only then carefully cut. It is recommended to make the bottom and the lid only after joining the walls, since in the process it may turn out that they have slightly different sizes than planned in advance.
- For a viewing window, a hole of 10x10 cm is made at the top, but at the same time it is covered with glass or plastic wrap to preserve heat.
- At the top and bottom make 2-3 ventilation holes with a diameter of 1.5 cm.
- After assembling the body, it must be glued, and all the cracks are sealed with sealant.
- For strength, the structure can be wrapped outside and inside with tape.
- At the bottom, 2 bars must be glued so that the box does not stand on the bottom, but lags behind the floor. This will improve ventilation and reduce heat costs.
- Next, inside you need to mount 1-2 lamps with a power of 25 watts. They also put a temperature sensor and a small fan (from the computer).
- The holes through which the wires pass must be sealed with cotton wool.
- At the end, a bowl of water is placed inside.
From a cardboard box
Another simple option for creating a compact size incubator is one of the cheapest. At the same time, only 3-6 hours are spent on the whole work. Such an incubator is characterized by medium size (per 100 eggs) and moderate fragility.
- Stage 1. First, a box of suitable size is selected, the optimal dimensions are 55x45x60 cm. Of course, in the absence of one, you can take any box. Inside, for additional thermal insulation, you can finish the surface with cotton wool, paper or other porous material.
- Stage 2. Then you need to cut 3-4 holes for lamps and wiring. It is better to take low-power lamps of 25 watts (2-3 pieces). At the same time, they must be placed at a distance of 15 cm from the tray with eggs. This is required so that the masonry is heated evenly around the entire perimeter. Holes for wires must be sealed with cotton wool or paper. You also need to make 1-2 holes for ventilation at the top and bottom.
- Stage 3. Then the slats are mounted on which the eggs will need to be placed, as well as the door.
- Stage 4. Then the thermostat sensor for the incubator is placed at a distance of 2 cm from the tray. A bowl of water is placed at the bottom so that there is moisture in the box. At the end, a viewing window is made into which glass or plastic film is placed so that heat does not escape.
When you just start your business, you don’t even have money for an incubator, at least we don’t. It is for this very reason that we decided to make the incubator ourselves and did everything according to the instructions given. We have been using the incubator for a month now, it shows its best side. Who needs it - feel free to do it!
To be honest, I would never have thought in my life that you can make an incubator with your own hands. But the above instructions, the availability of all the materials that are necessary for the operation and manufacture of the incubator, and the existing working result may indicate that it is quite realistic to make an incubator.
It turned out to assemble an incubator with your own hands is not so difficult. My husband got the job done very quickly.