Poultry is very sensitive and vulnerable to temperature changes, low light and high humidity. The first weeks of their life should be spent in warm and comfortable conditions. Otherwise, there is a risk of hypothermia, illness and death.
To keep the chicks alive, experienced poultry farmers use brooders . With blueprints and dimensions, they only take a few evenings to make. What is a brooder and how to make it depending on the type of birds being bred?
- What is a brooder for?
- Necessary materials
- Required Tools
- How to make a chicken brooder
- How to make a simple brooder:
- Do-it-yourself step-by-step making of a wall-mounted brooder (personal experience)
- brooder for quail
- brooder for ducklings
- broiler broiler
- Brooder for turkeys
- Photo: do-it-yourself brooder options
- Conclusion
- Useful video about assembling a homemade brooder
What is a brooder for?
A brooder is a place or room reserved for the life of chicks. It should have an accessible place for feeding, drinking and heating the chicks.
Primary requirements:
- dry, non-slippery floor;
- good ventilation and absence of drafts;
- reliable coating that protects against precipitation;
- the presence of a heating system. Installed heater and thermostat ;
- sufficient lighting. For the passage of ultraviolet, some walls are made of mesh, and at night they are hung with a cloth to reduce heat loss;
- the presence of a separate removable tray or container under the floor for excrement;
- the design should be easy to disinfect and clean.
Necessary materials
To make a reliable brooder with your own hands, you need to use high-quality, wear-resistant materials. It is desirable that they withstand exposure to moisture, light and heat. You can use the following materials:
- plywood or OSB sheet - for the base of the structure and its walls;
- wooden bars and slats - for the frame, doors and other elements;
- galvanized mesh with cells 10 × 10 mm - to protect against other animals;
- slate sheet - to protect against precipitation;
- hinges - for doors;
- tin sheet, pallet, oilcloth or plastic panel, mesh - for excrement.
- The net is taken depending on the age of the chicks. The smaller they are, the smaller the size of the grid cell;
- screws or nails;
- incandescent lamp from 25 to 60 W;
- reflector;
- lamp cable and plug;
- thermometer;
- heater;
- thermostat - to regulate heating, as well as auto-off and turn on the incandescent lamp.
Required Tools
To mount the structure with your own hands, you will need a certain set of tools:
- Screwdriver or drill.
- Hacksaw.
- Screwdriver.
- Roulette.
- Metal scissors.
- Hammer.
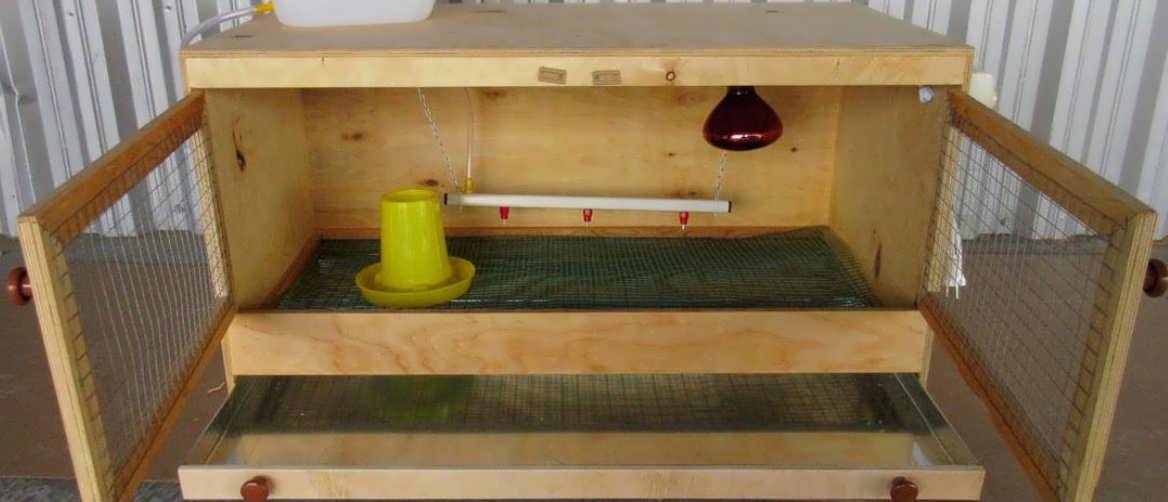
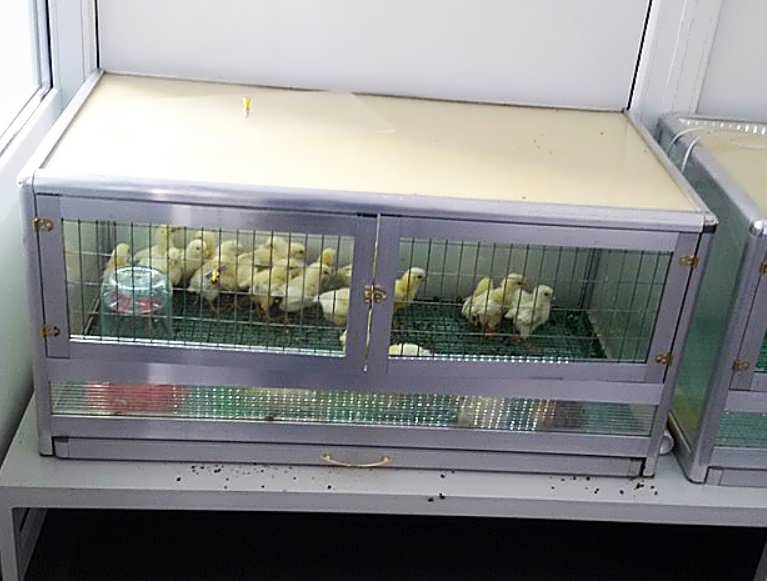
How to make a chicken brooder
Brooder for raising chickens differs in design from the design for other birds. The table below will show 4 characteristics of such brooders.
| Peculiarities | Explanations |
| small sizes | Optimally 1 × 0.6 × 0.6 m. |
| Durable materials | Chipboard or plywood is used to provide warmth, protection from drafts and moisture. Since chickens have liquid droppings and often splash water, the chipboard will not get wet. |
| Removable pallet | Once the sand under the chicks' feet is contaminated with droppings, the tray can be easily removed and the sand replaced. |
| Sustainable drinker and feeder | Thanks to them, the chickens will not turn over the feed and water, will not enter there with their paws and will not contaminate them with dung residues or sand. |
How to make a simple brooder:
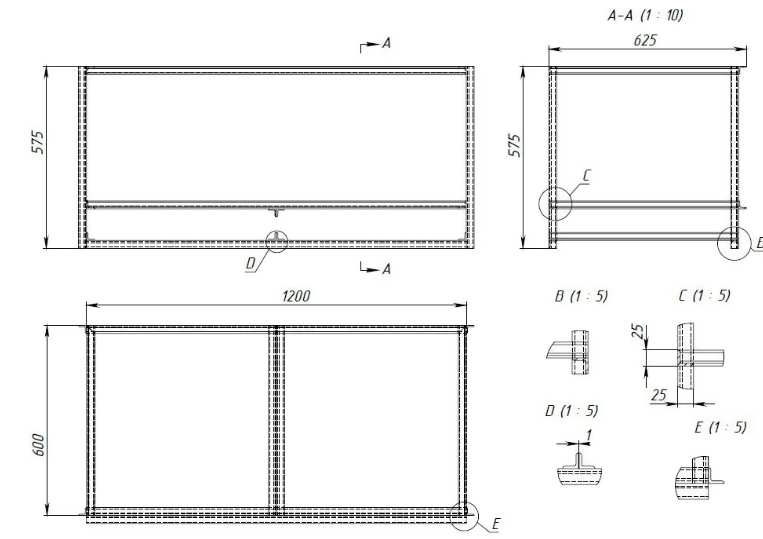
- Make an approximate design drawing, depending on the number of chickens.
- Mark the plywood to size and cut out the side and back walls.
- Cut out 6 planks for walls of the same length from the bars (stiffening ribs). They are fastened, retreating from the edge by a few centimeters.
- Do the same with the bottom, observing all dimensions. Otherwise, the bottom and the stool tray cannot slide out easily.
- Drill a hole for the wiring, stretch the wires, fasten the cartridge, lighting fixture and heater.
- All walls can be insulated with foam to avoid drafts and keep the heat inside.
- Bring all sides together. If everything is done correctly, then the grooves on the bottom wall will coincide with the side ones.
- Cut the front wall out of plywood, and attach hinges to the side for future doors.
- Make a hole or window in the sheet with a strong mesh for monitoring the chickens and ease of maintenance.
- Cut a sheet of metal or plywood for the lid.
- Make a pull-out tray out of a material that doesn't get wet or rot. Fix the pallet with wooden blocks.
- Set up containers for food and water.
- Warm up the brooder and let the chickens in.
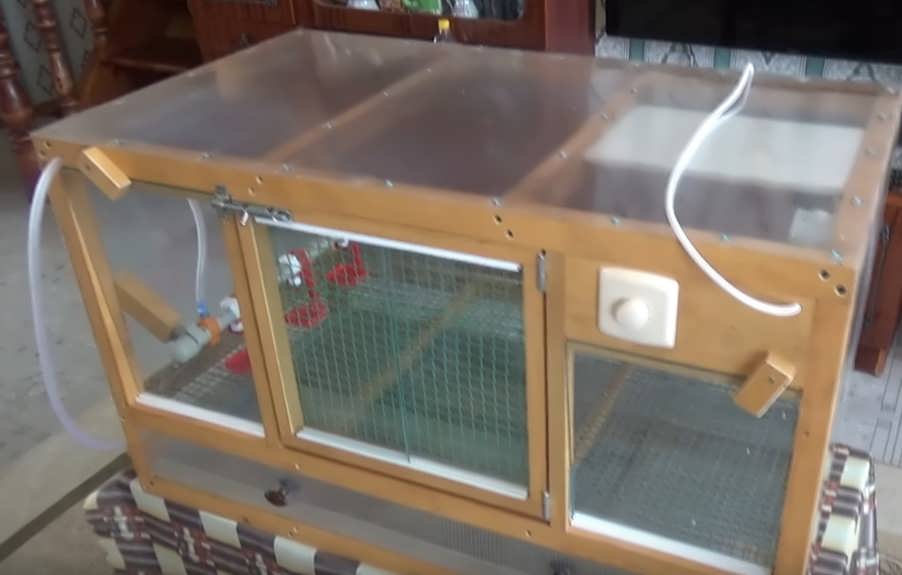
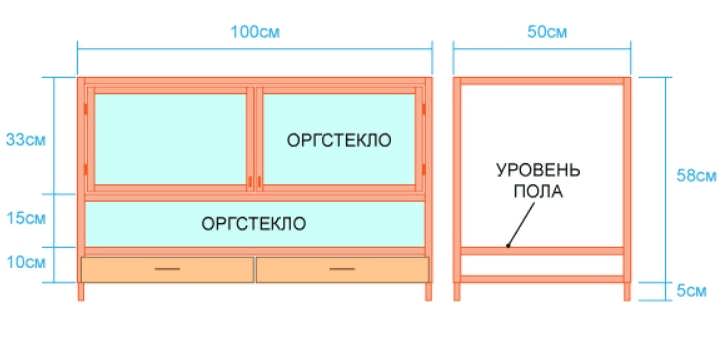
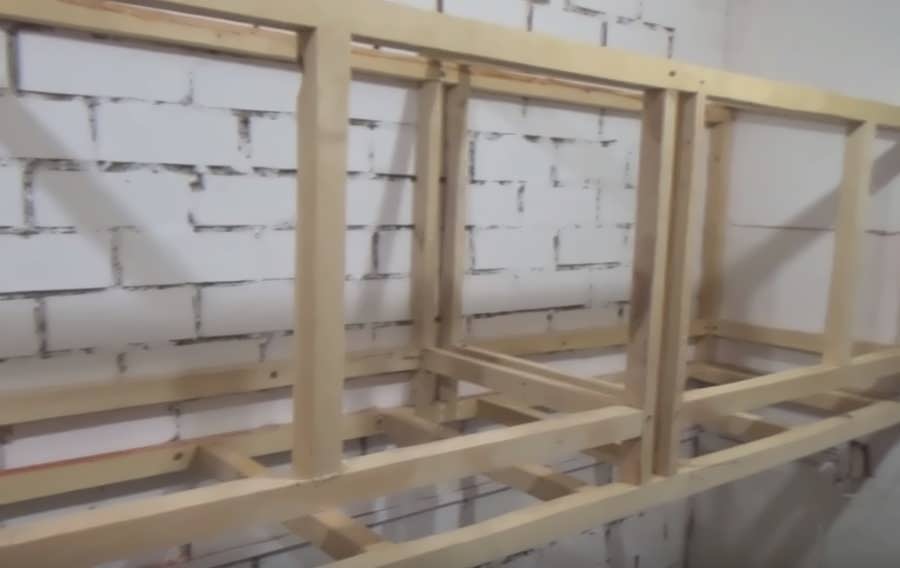
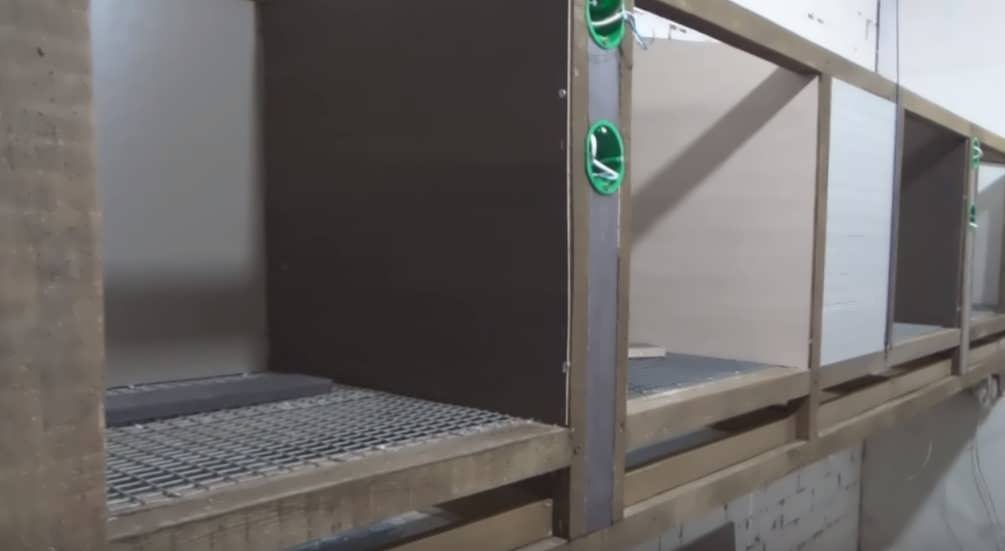
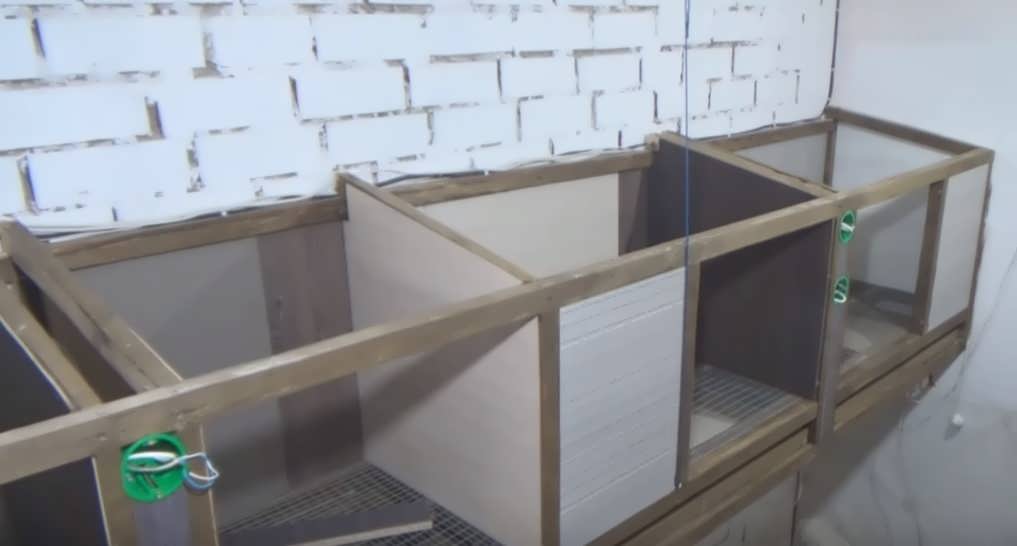
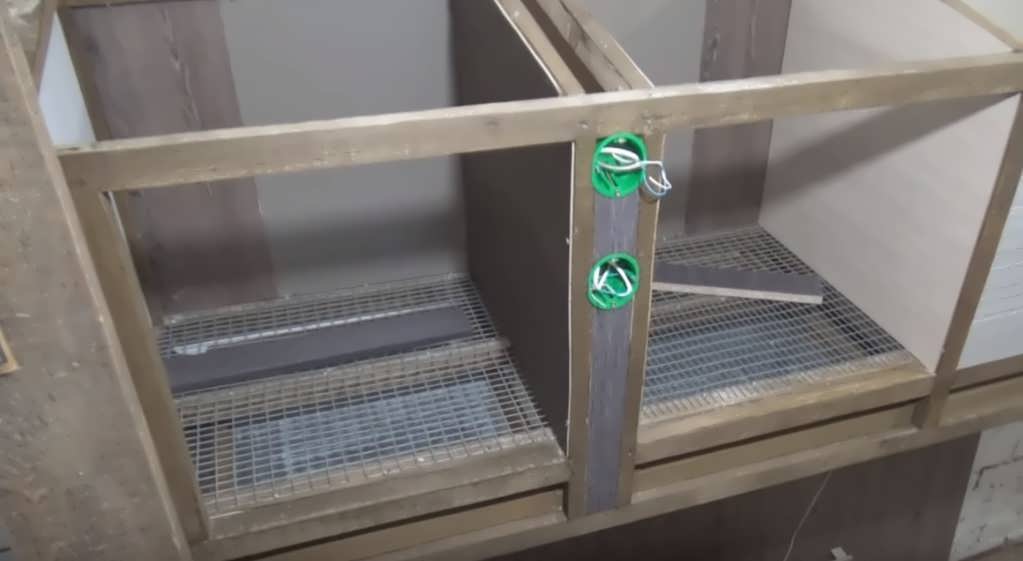
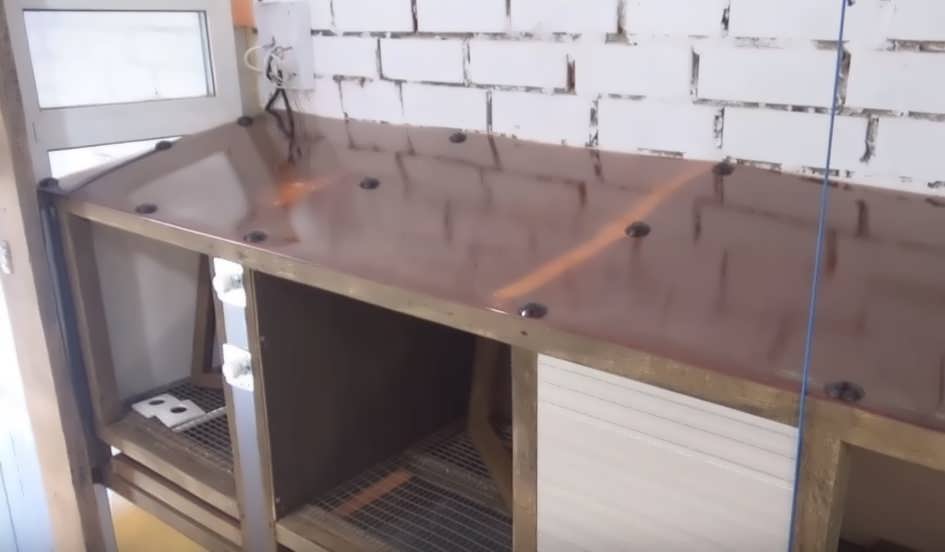
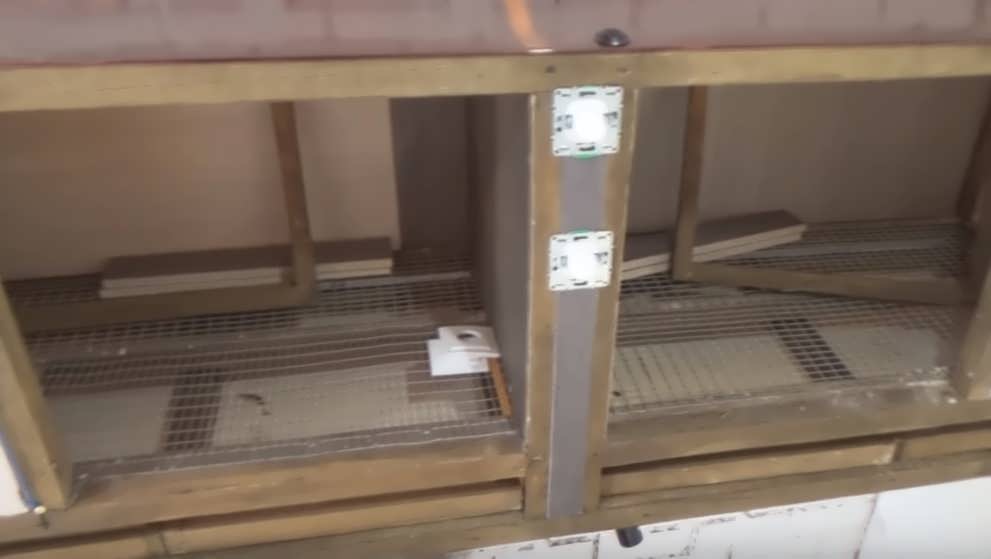
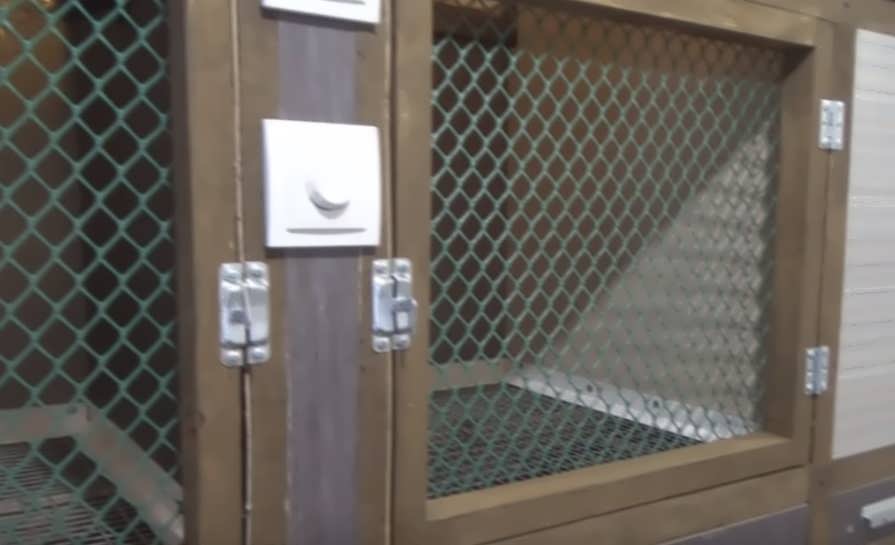
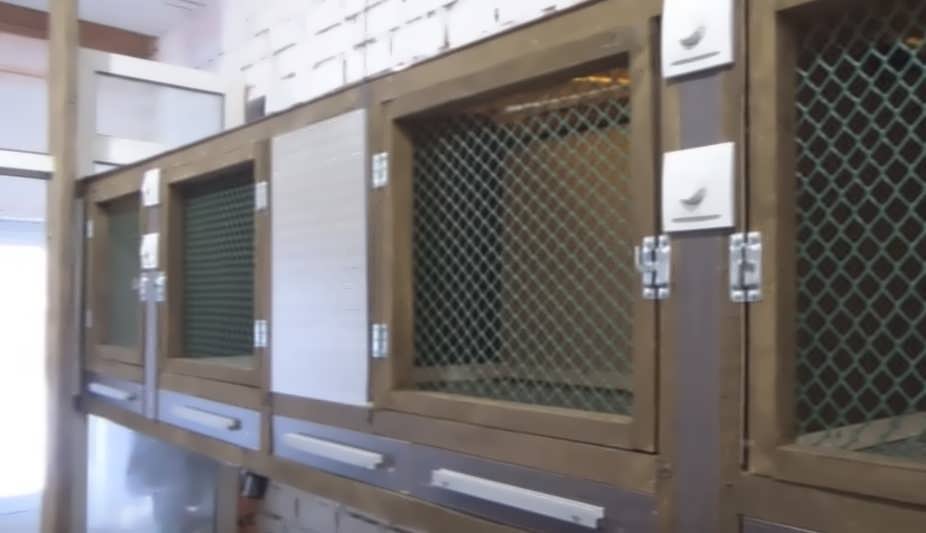
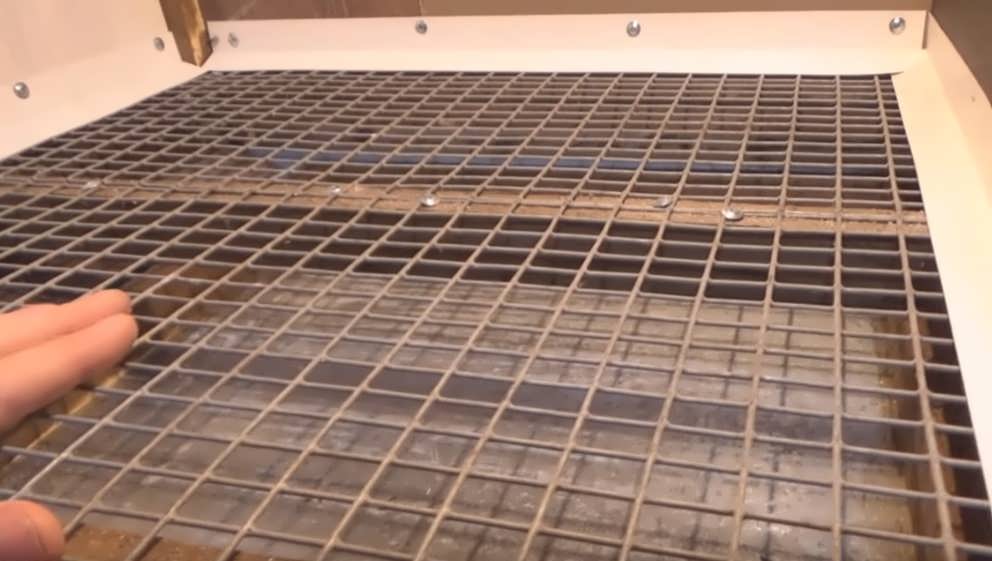
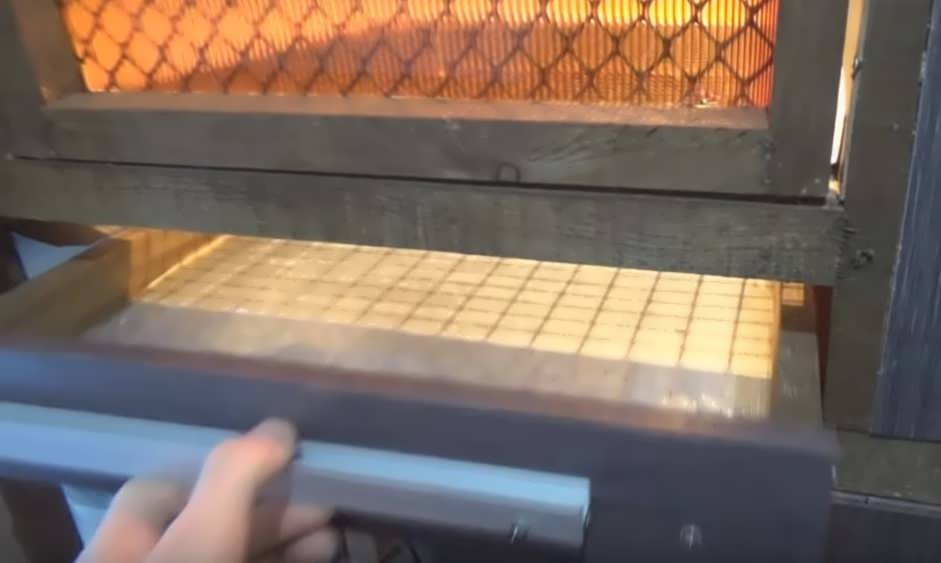
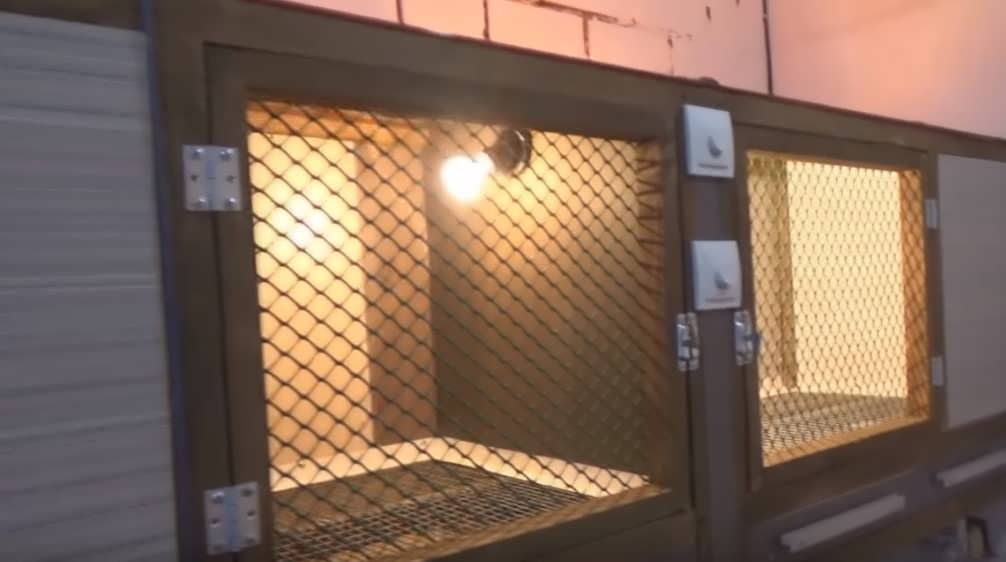
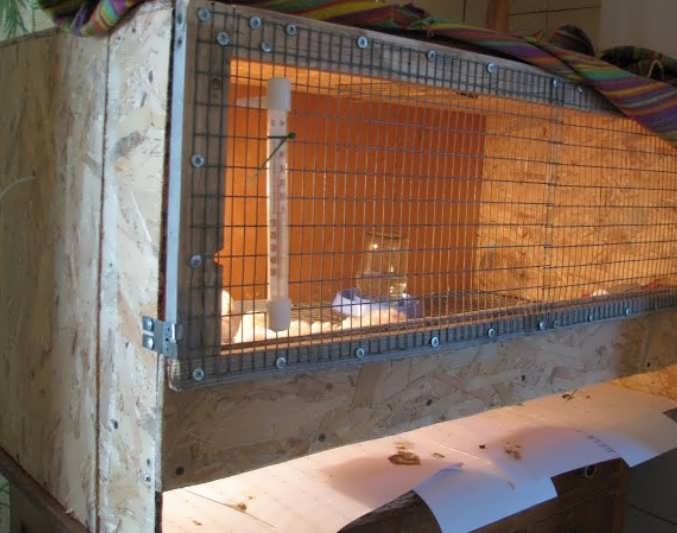
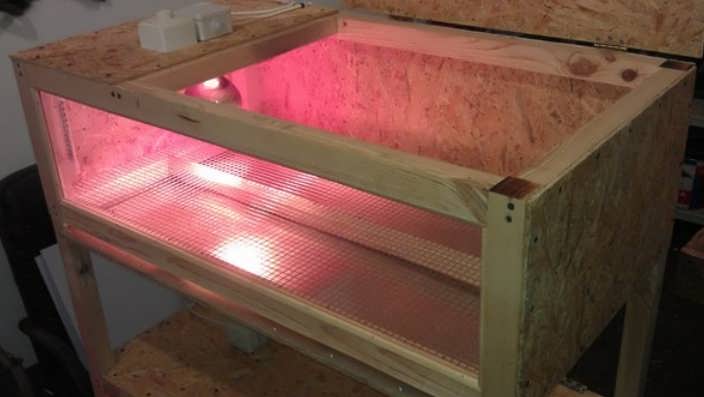
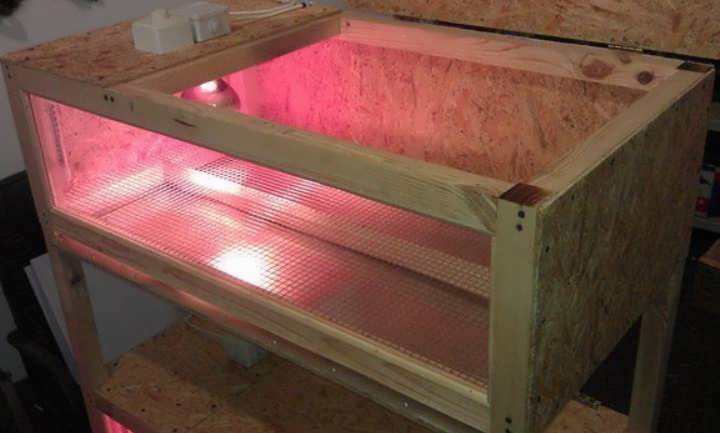
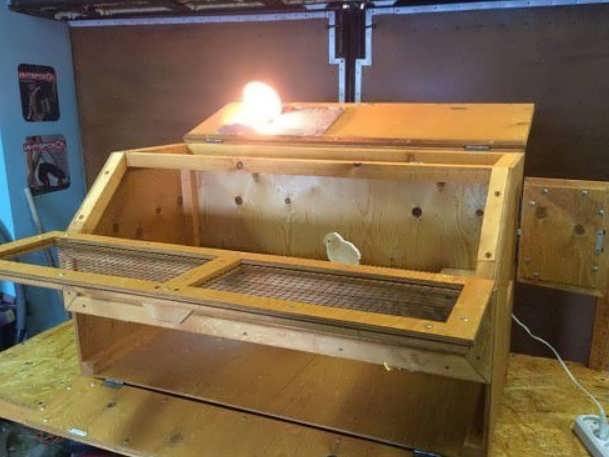
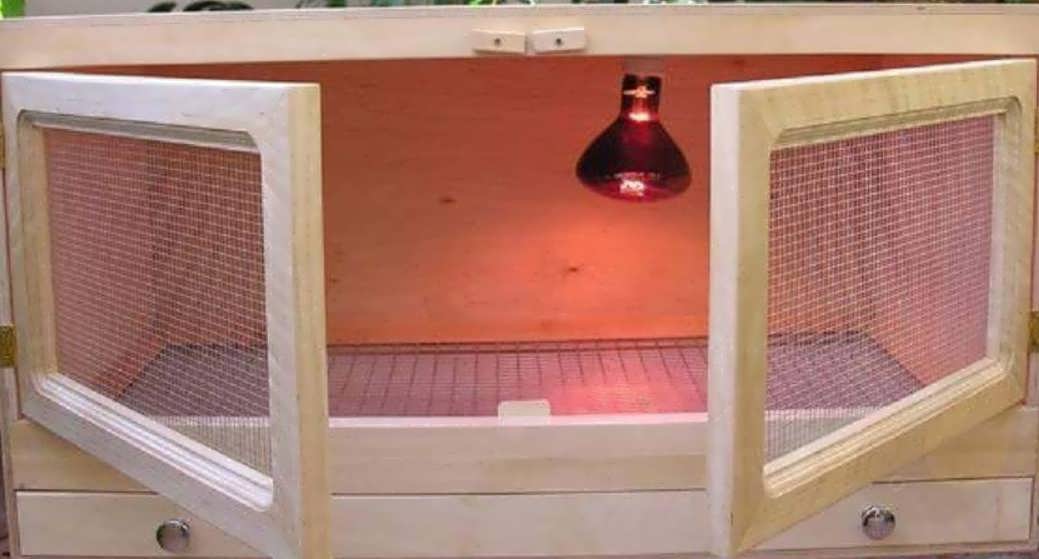
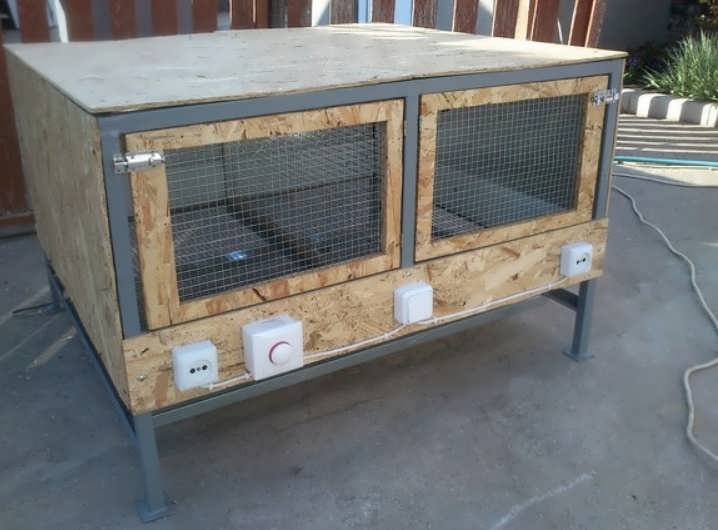
Do-it-yourself step-by-step making of a wall-mounted brooder (personal experience)
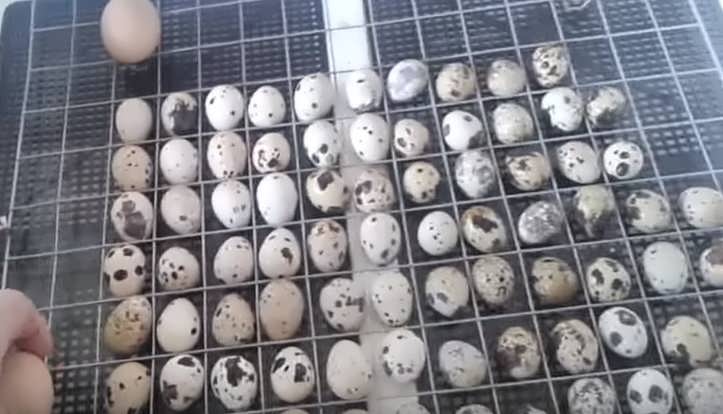
brooder for quail
Quails need special conditions. For quail it is important that:
- Lighting for the first 7 days was around the clock. They are sensitive to light and grow faster if there is enough light. From the second week, the lighting is turned off for 3 hours, then for 12 hours.
- The temperature in the quail brooder on the first day of life was about 37°C. Then, 1°C every 3 days, the temperature is reduced, bringing to 22°C.
- The room was well ventilated, there was no smell of hydrogen sulfide and dust.
- Humidity was around 60-70% the first week and 50-60% the next.
- There was a supply of food and drink in a remote way. Quails are shy chicks, so the constant replacement of food in a saucer or drinker leads to stress for them. Solution: you can take the hose out of the drinker and the bottle out of the saucer. At the right time - add food and add water without interfering with the space of the chicks.
- There was plenty of room in the brooder. Experienced quail breeders are advised to make a brooder with dimensions of 700 × 500 × 400 mm.
To prevent the quail from getting sick, the brooder must be kept clean. Do not put cardboard on the bottom, as it is flammable, fragile and does not withstand antiseptic treatment. In this case, plywood or boards from 20 to 30 mm are suitable. They must be treated with safe disinfectants. The removable litter net should be cleaned regularly.
brooder for ducklings
Breeding ducks should take place in comfortable conditions for chicks. There is a misconception that ducks love dirt and moisture. But this leads to diseases of the chicks, weight loss and poor quality of feathers and down.
Therefore, they must be kept clean. If paper is laid on the floor, then you need to change it at least 1 time in 2 days. The feeder is cleaned regularly, and the drinker is washed with hot water and disinfected every day.
Ducklings need space in the brooder. About 40 newborn ducklings or either 10 chicks that are up to 3 weeks old, or 3 adults feel comfortable per 1 m2. The optimal construction area is 300 cm2, and for musky ducks it is 500 cm2, and the height is 40 cm. Then the birds will not need to bend their heads while in the brooder.
In the brooder, it is important to maintain a temperature of approximately 32 ° C - for small ducklings, and for those who are 1 week old - 16 ° C. Do not allow the temperature to drop to 11 ° C, otherwise the chicks will lose productivity by 20%.
broiler broiler
There are several features of the mounted structure that are worth considering:
- Make the floor non-slip so that the paws of the broilers do not disperse.
- Dishes for food can be a regular egg tray. Thanks to this design of the feeder, each broiler can easily get to food.
- Choose feeders and drinkers that won't hurt the broilers and won't tip over due to their excessive activity (they like to walk on the edges).
- The assembled product is painted to increase its service life.
- It is advisable to treat the finished brooder with a soapy disinfectant solution.
Brooder for turkeys
25 turkey poults are allowed per 1 m2. Born chicks need constant lighting. For this, an infrared lamp is used, which will also serve as a heater.
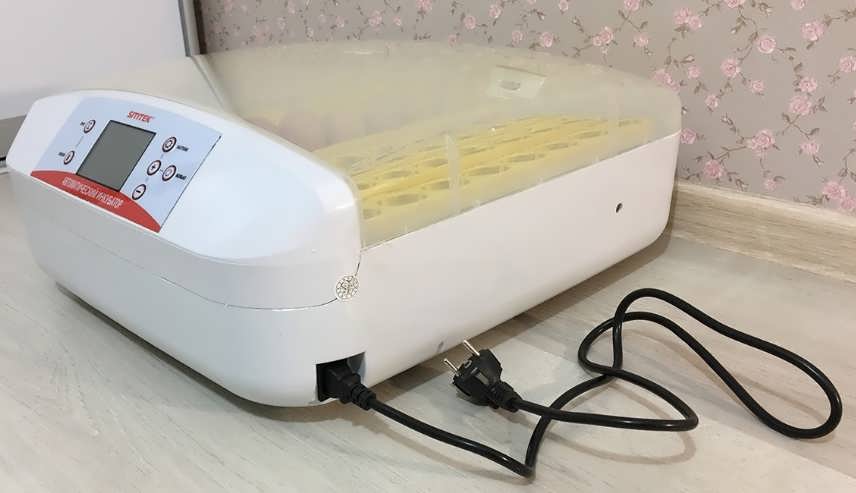
Read: How to breed turkey poults in an incubator at home.
Dishes for water can be a nipple drinker, which is attached to the wall, preventing liquid from spilling. Since turkey poults tend to spread food over the entire surface, it is better to equip the feeder with separate cells or put limits on the eating area. It is important to wash dishes for food regularly so that the chicks do not become infected from unsanitary conditions.
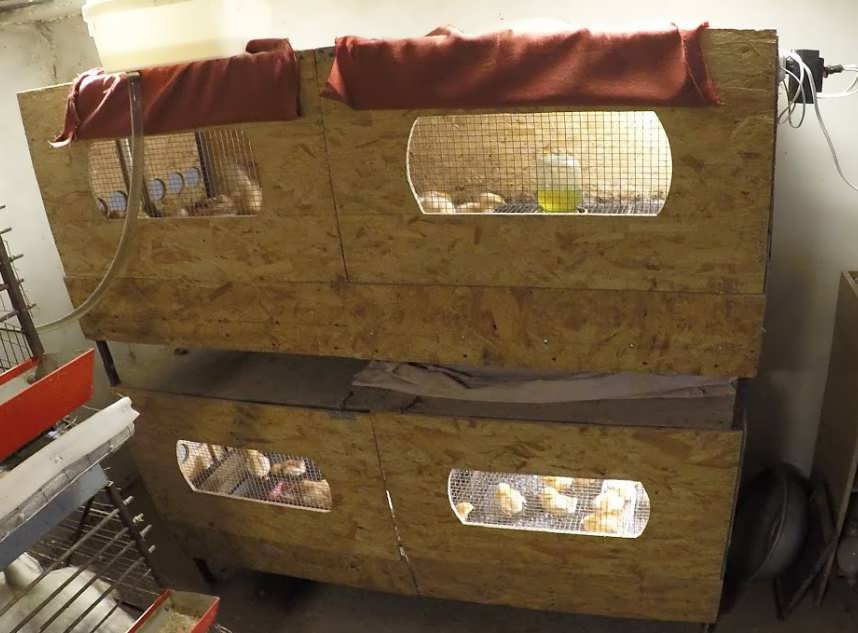
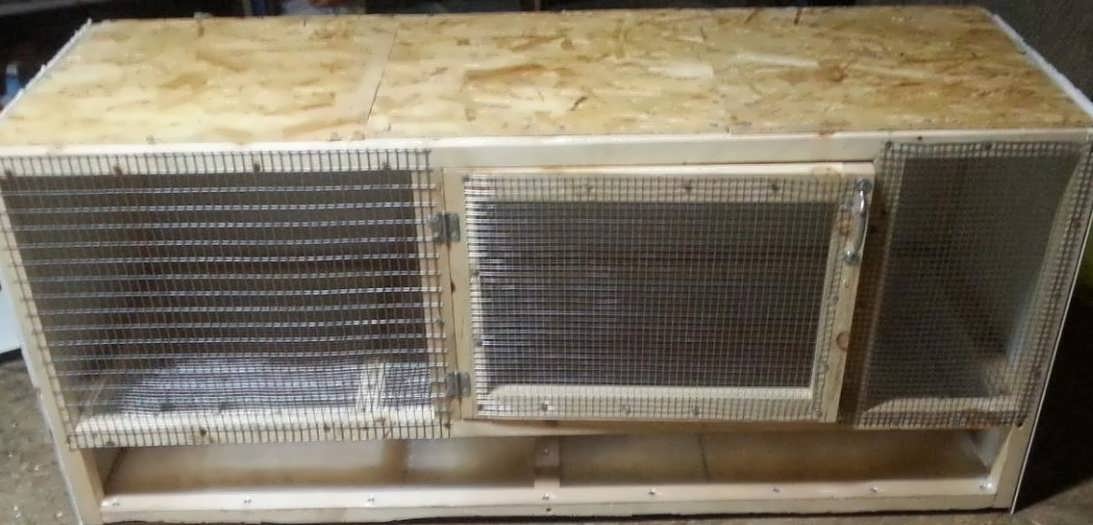
Photo: do-it-yourself brooder options
Conclusion
The principle of mounting brooders for all types of chicks is simple. There are several features for each species that need to be considered. But in general, having calculations, drawings, suitable tools and hard-working hands, you can easily make a brooder at home, no worse than a store-bought one.
Thanks for the info. I made a brooder for ducklings, actually not difficult, as it seemed at first glance.
Decided to try breeding chickens.
So far, I don’t have money to buy everything I need, and therefore it was decided that everything I can do is to do it myself. Of course, I hurried to use the instructions provided above and everything worked out for me. so thank you for it and I recommend it to everyone.
I have been puzzled by this question for a long time and still could not find a decent instruction on how to do this, I still could not start breeding chickens, since the equipment was not ready. But now the process has started and is going well. The equipment itself turned out to be done quickly, no difficulties arose. Works great.
My wife made me make a brooder, I assembled it from foam plastic - quickly and not expensive
I started to master poultry farming and so far I don’t have much money. So I do everything by hand. Mastered this business. Thanks for the instruction.